


Lesson 1 : Python in Maya
In this course, we will learn how to use Python in Maya and explore all the potential possibilities for the basics of Python within Maya.
Additional courses will follow to further expand our knowledge. We will teach you how to use Python in Maya, including utilizing scripts to code outside of Maya and still be able to execute them directly within Maya.
Table of Contents
1. Introduction to Python in Maya
2. Where to write the first scripts in Maya
3. First python on Maya script
4. Discovering tools
5. Putting it into practice
6. Working environment
7. Sources
1. Introduction
In this course, we will delve into Python within Maya and explore all the utilities Python can offer us in the context of Maya.
Throughout this course, we will learn how to use Python and create
our first scripts that will allow us to automate actions.
maya.cmds is a Python module integrated into Autodesk Maya that
allows manipulation of the interface and scene elements. It provides
a high-level interface for interacting with Maya from Python scripts.
We will cover the fundamentals of the Maya.cmds module, and we
will learn how to create scripts to group objects and utilize key
commands within Maya cmds.

2. Where to write the first scripts in maya
To do this, you just need to go to the script editor right here at the bottom, as shown in the example. This interface has three main buttons and two areas that are very useful for us.
Firstly, there's the Play button which will execute the Python program. This button will clear the program you've written just below, but it has the ability to execute the script only on the selected lines. Then there's the double button which will also execute the Python program, but it won't delete the program. However, you won't be able to select parts of the script to execute - it will run the entire script.
Next, the first area below is simply where you can write your Python script. Above it, the second area acts like a terminal. It's not exactly a terminal, but we can compare it to one. It will give us all the necessary information, whether it's Python code or information about the scene itself.

To start, if we want to use the maya.cmds module, we'll need to write the following in the dedicated script writing area, like this:

3. First python on Maya script
Now, we can begin writing our first lines of code. For each line of Python code using the cmds library, you'll essentially be issuing commands that Maya will execute.
To start, we'll learn how to create cubes, spheres, and groups. To do this, just enter the following commands:

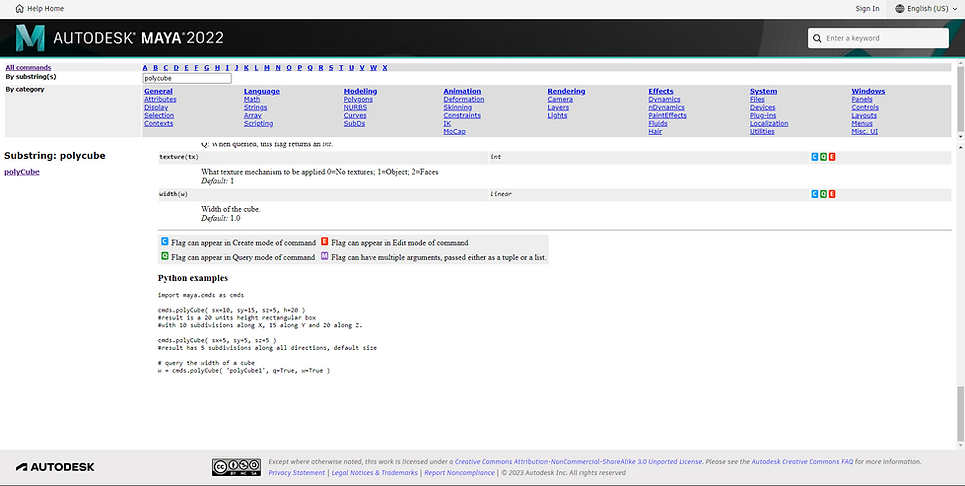
What you need to know is that if the text isn't in blue, it means the method doesn't exist. To find out what methods the Maya module cmds provides, you can access this website either by clicking here or by going here in Maya.

From there, you'll find all the possible methods that Maya has to offer.
By visiting this website, you can discover the various parameters and their functionalities that you can use with the methods. At the bottom, you'll also find examples related to that method.

You shouldn't underestimate this documentation; it will be a tremendous help to you.
4. Discovering tools
Now, for the rest of the course, we're going to simulate a need as an example. For instance, let's say we need to create a group and parent the selected object to it every time we select an object. We'll even go as far as renaming the group with the name of the selected object.
In this example, we'll use the following methods: cmds.ls(), cmds.createNode(), cmds.rename(), and cmds.parent().
I'll detail step by step what these methods do and how they work.
cmds.ls() will allow us to retrieve information about all the selected objects we have in the scene. If we don't provide any parameters to the method, it will by default return all the objects present in the scene as a list.

Indeed, we can see that Maya will return all the names of the nodes present in the Maya scene.
We can specifically request to retrieve only the objects we have selected by using the sl=True parameter. We can easily find this in the Maya documentation right here. Moreover, we can see that sl takes a Boolean argument.

If we go back to Maya and test this now, you'll see that it returns the object I selected, which is the sphere. What you need to know is that three-quarters of Maya methods will return lists with the names of the nodes, even if there's only one element. It will still be a list.


That's how we can retrieve the selected node and its name.
cmds.createNode() allows you to create any possible node in Maya. For example, if we go back to what I said above about creating a sphere or a cube, I used cmds.polyCube() or cmds.polySphere(). These methods work, but the createNode() method allows you to avoid having to know many methods. What you need to know is that if you write the name of a node as an argument, you create that specific node. (However, please note that createNode() won't work for meshes.)

What's important to know is that even with these methods, they can return information. In this case, they return the names of the created nodes.

cmds.rename() allows us to rename a node.
For this, there are two ways to work with it. First, you provide the name of the node you want to change, and then as the second parameter, you provide the new name.

Alternatively, if an object is already selected, we don't need the first parameter; we only need the new name.

cmds.parent() is the last method we'll cover. This method allows us to parent nodes together. It takes the name of the object we want to parent as the first parameter, and the second parameter is the name of the target object.
�
For example, if we want to parent the locator to the group, we need to write:
5. Putting it into practice
Now, thanks to the explanations I've provided, we can write the script that will allow us to achieve the scenario I explained earlier.
To do this, we'll need to list all the selected elements. Then, for each selected element, we'll create a transform node, rename it, and finally parent the selected node to the created transform node.
To start, we'll list the selected elements in a for loop to retrieve each element from the list.

Then, inside the loop, we'll create a transform node and rename it right after with the name of the node plus "GRP".

I placed the variable GRP in the first parameter of cmds.rename() because if you recall, the createNode() method returns the name of the created object. Then, in the second parameter, I added node + '_grp'. As I mentioned, we retrieve the list of all selected objects using cmds.ls(), and in the loop, we take the name and add "GRP" to it.
Now, all that's left is to parent the node to the created group.

But be careful, there's a trap in what I wrote. In fact, if we execute the code as is, it will say it can't find transform1 because we're using the variable GRP as an argument. Since we changed the name of the created node, GRP is equal to the name before renaming it. Now, the name of the node is node + '_grp' because that's how we renamed it.

So, to correct this, we just need to change cmds.parent() to use node + '_grp' instead of GRP.

There you go, you've written your first Python script for Maya. Now, thanks to this, we can go further because it was an example to show how the Maya module works. What's important to know is that each method offers multiple arguments, which you can find in the Maya documentation. Maya methods often work on the principle of arguments. The more arguments you provide, the more precise the action will be for that method.
For example, let's take the cmds.circle() method. If we provide 0 arguments, it will create a basic circle.

Absolutely, you've now written your first Python script for Maya. With this, we can go even further because it was just an example to demonstrate how the Maya module works.
It's important to note that each method offers multiple arguments, which can be found in the Maya documentation. Maya methods often operate based on arguments. The more arguments you provide, the more specific the action will be for that method.
For instance, let's consider the cmds.circle() method. It allows us to create circles. If we provide 0 arguments, it will create a basic circle. However, if we delve into the various arguments this method can accept, we'll see that we can change the size of the circle, its degree, its name, and many more attributes.

For example, to go further in the process. If the selected nodes are curves, it will create a transform node and parent the curve inside it. Then it will create a joint that will be parented to the curve. But if the selected nodes are locators, then it will change the locator's color to blue and change its name.
Here is what the code looks like to perform this manipulation:

import maya.cmds as cmds
list_transforms = cmds.ls(sl=True)
for transform in list_transforms:
if cmds.listRelatives(transform, c=True, typ=['nurbsCurve']):
print("it's curve")
grp = cmds.createNode('transform', n= 'grp_' + transform, ss=True)
cmds.createNode('joint', n= 'jnt_' + transform, ss=True, p = transform)
cmds.parent(transform, grp)
elif cmds.listRelatives(transform, c=True, typ=['locator']):
print("it's locator")
shape_locator = cmds.listRelatives(transform, c=True)[0]
cmds.setAttr(shape_locator + ".overrideEnabled", 1)
cmds.setAttr(shape_locator + ".overrideColor", 13)
else:
print("it's not locator and not curve")
This code is a Python script intended to be executed in Autodesk Maya, a 3D modeling and animation software. Here is what it does specifically:
-
It imports the 'cmds' module from Maya, which provides commands for interacting with Maya's interface through Python.
-
It retrieves the list of currently selected objects in Maya (list_transforms = cmds.ls(sl=True)).
-
Then, for each element in the list 'list_transforms', it performs the following actions:
-
It checks if the object has children that are nurbs curves (nurbsCurve) using cmds.listRelatives(transform, c=True, typ=['nurbsCurve']).
-
If so, it displays "it's curve", creates a new empty group (transform) named "grp_" followed by the object's name, as well as a new joint (joint) named "jnt_" followed by the object's name, and parents them under the empty group.
-
If the object has children that are locators (locator), it displays "it's locator", then retrieves the first child that is a locator (shape_locator = cmds.listRelatives(transform, c=True)[0]). Then, it modifies the attributes of the locator to enable color override and sets the color to code 13 (which corresponds to a specific color in Maya).
-
If the object is neither a locator nor a curve, it displays "it's not locator and not curve".
-
In summary, this script iterates through the selected objects in Maya and performs specific actions based on their type: if they are nurbs curves, it groups them with a joint; if they are locators, it modifies their color attributes; otherwise, it displays a message indicating that it is neither a locator nor a curve.
6. Working Environment
For the sake of simplicity, we will never code directly in Maya as it is not very intuitive. However, thanks to Visual Studio Code, which can be downloaded here, we have the ability to have code completions and edit our code much faster, providing us with a much more significant time-saving advantage.
First and foremost, in Visual Studio Code, you will need to install additional extensions that will give you useful features for Maya.
Thanks to the downloaded extensions, you now have the ability to have auto-completion and direct access to the documentation like this.

By clicking on the link, the documentation page opens.

Now you have two options for running your Maya code. You can either copy and paste the code, or create a module that you'll import into Maya.

Alternatively, in the second solution, you will need to copy your Python file into the Maya scripts directory:
'C:\Users\{name}\Documents\maya\{Version}\scripts'.
Then, in Maya, you will need to import your module and use 'module reload' to reset it so that any changes take effect after saving. This is necessary because otherwise, you would have to shut down and restart Maya each time, which can be quite inconvenient.

Thanks to the second technique, in Visual Studio, you can open the script folder that Maya uses for all the Python scripts you create. The advantage of doing this is that you just have to press the button in Maya as shown below to link, in quotes, your Visual Studio to your Maya. This will allow you to make changes only in your Visual Studio and press a button to execute your program, as shown in the examples below

I hope this lesson has served you well !
7. Sources

