
Lesson 2 : Workflow in Nuke
For this lesson 2, we will see how to create a compositing workflow. We will use a spatial shot as an example because it requires a lot of compositing, which is why it is a good exercise to understand this subject.
Table of Contents
1. How to start a good compositing ?
2. Shuffle connection and merge all layers
3. Background creation in Nuke
4. Final grading and post effects
5. Sources
1. How to start a good compositing ?
To create a compositing, you first need to have all the assets you will need in your 3D scene. You can add elements in compositing later, but here everything has been done in 3D. Concept art can help you see what you will need or not in your workflow, including camera movement, artistic direction, and what the shot needs to convey. It is important to ask yourself questions when starting from scratch.


For this shot, we have in Maya: the planets with texture shaders / spaceship with animation, texture shaders / the station with animation, texture, and shaders. Additionally, we have general lighting for the scene.
We can therefore launch the renders with the desired AOVs for this shot. It is important to separate your layers for more control in post-production. Foreground / Middleground / Background are the most common. Here, we are rendering with Renderman, so the layer system is presented as follows:
Render Set up Maya Legacy:

You can use two methods to create your layers: Renderman or Maya. Here, we have rendered with the layers from Maya.
Render Set up Maya:

Once the layers are created, all that is left is to drag and drop the meshes you want to separate.
When we are satisfied with the renders, we can now move into Nuke.
2. Shuffle connection and merge all layers
Here is the node network for using the shuffle nodes.
What is a shuffle?
https://learn.foundry.com/nuke/content/comp_environment/channels/swapping_channels.html
The number of shuffle nodes depends on the number of AOVs. It is proportional to reconstitute your 3D beauty. This is why it is important to think carefully in advance about what will be useful to render or not, as rendering times can quickly explode and make your compositing heavy. So think about optimization. The most common ones are: direct diffuse, direct specular, indirect diffuse, and indirect specular.

Setting the merge to (plus) is important. The merge node has many operation modes, the most commonly used being A+B.
These are the same operation modes as in Photoshop and its layers.
The most well-known are:
Over
From
In
Multiply
Overlay
Stencil
You can find all the operations : here:https://learn.foundry.com/nuke/content/comp_environment/merging/merge_operations.html
Don't forget to double-click on your shuffle node and assign the AOVs from your EXR file.

Once your beauty is reconstituted, it's time to start compositing. You can then play with color correction nodes per layer to adjust your render. For example, if I want to enhance the light reflections on my object, I can add a grade node and create a mask (roto node) to define the area of interest to boost the lighting on the specular map.

Specular map Spaceship Before
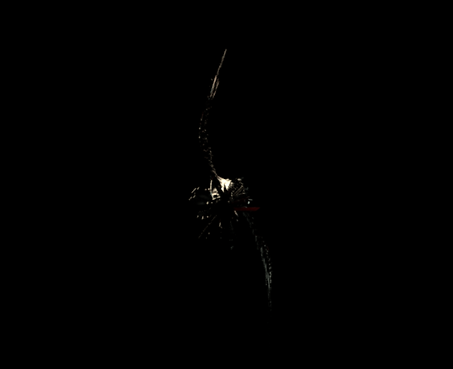
Specular map Spaceship After

You have quite a bit of freedom. You can also denoise your passes (AOVs) with the denoise node if your render had too few samples.

The denoise node allows you to remove the noise that certain AOVs have, especially the indirect and the SSS (subsurface scattering).
After correcting my beauty, I often add some color correction nodes to impact my global layer if needed. In your passes, you will have access to an alpha map, exported under the name a1 in Renderman, for example. This map will be useful for many things, particularly for combining our layers. It is vital to have it in your AOVs.
What is an alpha?
In Nuke, the alpha channel is an essential component of an image that controls transparency and how different elements are combined. It is used to define which parts of an image are opaque, transparent, or semi-transparent. This allows for the compositing of images by layering multiple elements while preserving edges and fine details. To view the alpha channel in Nuke, simply press the A key in the viewer.

Alpha Viewer

The Copy node is always accompanied by its premult node, which is very important.
3. Background creation in Nuke
In Nuke, we can create 3D spaces, which is very powerful. For the spatial shot, we had to create an entire environment within Nuke. With this example, we will see how to successfully create a galaxy in Nuke.
In a new file, we exported the camera alembic to have its movement in Nuke's 3D space.
We then created the number of cards (image projection on a planar surface) that we needed. Each card contains an image of a nebula. The nebulas need an alpha channel to be projected correctly onto the cards. The Keyluminance node is very useful for this.

Final Compositing for the sky
The Keyluminance node allows you to create an alpha from luminance data. Here, the nebulas are the source of light and the background is black, so it is quite easy to separate them from the background. You can adjust the ranges AB-CD of the keyer to find the right values.
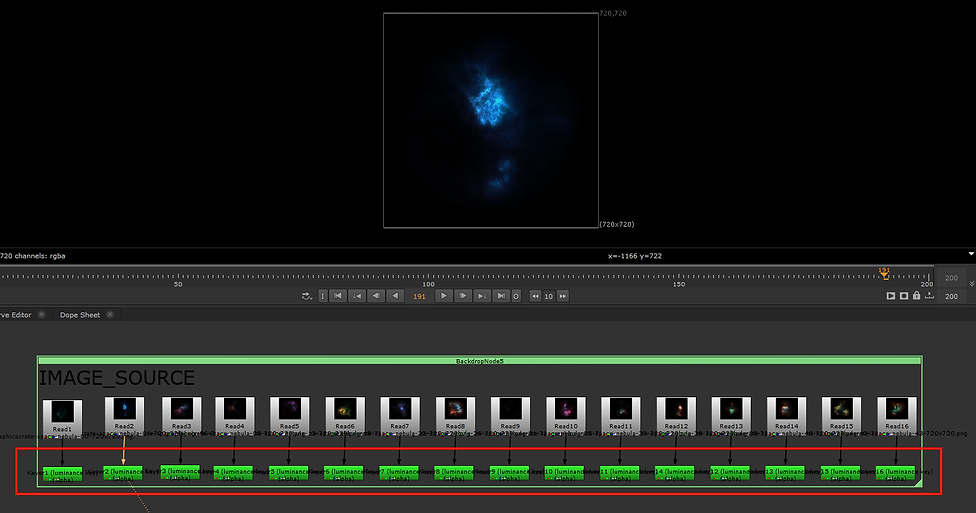

Alpha Channel
Now that we have the alphas for the nebulas, we can layer them to create depth in Nuke's 3D space (press TAB in the viewer to display the 3D view):

Since we created an HDRI for lighting composed of these nebulas, we will import it to start with a solid base. To place a nebula on a card (3D planar projection, red node), we will connect each nebula to a color grading node to create endless variations. On the Card, you can place it wherever you want in the 3D space. Then, simply connect it to the Merge Geo node, which can handle many inputs. Finally, connect each Merge Geo to the animated camera of the shot.

Set up for 1 nebula
What is the Card node in Nuke ?
Purpose: The Card node is used to create a flat, 3D plane in Nuke's 3D space. This plane can be used to project images or textures onto it, allowing for the integration of 2D elements into a 3D scene.
Functionality:
Projection: You can project a 2D image onto the Card, effectively placing that image in 3D space. This is useful for creating backgrounds, textures, or any flat image-based elements.
Transformations: The Card node allows you to position, scale, and rotate the 3D plane within the 3D space, giving you control over where and how the projected image appears.
Depth: By placing multiple Card nodes at different depths, you can create a sense of depth and parallax within your 3D scene.
Usage:
Creating Planar Surfaces: You use the Card node to set up flat surfaces for image projections, such as creating 3D backgrounds or visual elements.
Texturing: It's commonly used in conjunction with other 3D nodes to apply textures or images to 3D objects or scenes.
Scene Assembly: Cards are often used to build out environments or set pieces by arranging multiple Cards in a 3D space.
The Card node is essential for integrating 2D assets into a 3D environment, allowing for complex compositing and visual effects work.

Final set up for several nebulas

HDRI import
Camera Alembic export to Maya
Camera set up and HDRI
3D Setup in Nuke ( Red Node )
Setting up a 3D scene in Nuke involves several key elements to create and render realistic 3D environments. Here’s an overview of the main components and steps for setting up a 3D scene in Nuke:
Scene Node
The Scene node is the central point for assembling all 3D elements in Nuke. It allows you to group 3D objects, lights, and cameras into a single 3D scene. You can add Cards, Geometry, and Lights to the Scene node to build your environment.
Card Node
The Card node is used to create flat surfaces in 3D space. You can project images or textures onto these surfaces and position them in space to build backgrounds or set pieces.
Camera Node
The Camera node represents the viewpoint in the 3D scene. You can import animated cameras from alembic files or similar formats, or create a camera directly in Nuke. The camera determines the perspective and movement through the scene.
Scanline Render Node
The Scanline Render node is used to render 3D elements in the scene. It calculates the 3D view based on the camera and lights you have set up. The rendered output is then integrated into your compositing.
It’s up to you to create your own setup in the 3D space and use your imagination to create beautiful compositing with the camera movement.
After creating a background that suits your needs and retouching the AOVs of all your layers, you can finally merge all the layers (foreground, middleground, background). In this spatial shot, we had the nebula background, the planets, the space station, the spaceship, and the meteors on different layers.
You can then create integrations for the different layers using effects such as a lightwrap, a flare, defocus or similar techniques. These effects will help smooth out the transitions and create a true unity among the layers.

Here is an excerpt from a template available in the shop with free access, which will help you save time in compositing and understand the functioning of certain nodes. In this example, we merge the background with the sky.
A lightwrap is used to create a subtle halo of the sky around the background to assist with integration, and the defocus will use the Z-depth you have chosen for your image.
A quick reminder: Branch B is often the main branch, while Branch A represents what you want to add to your node tree.
Here is a brief summary of an efficient and fast Nuke template:
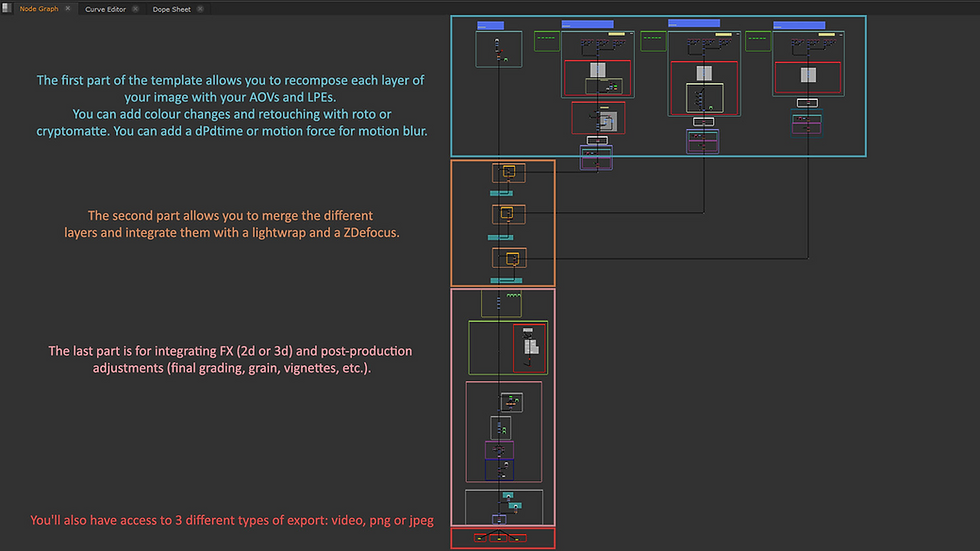
Template Nuke free on the shop
4. Final grading and post effects
Final Grading is crucial as it helps match all the layers together. You can achieve this with nodes such as ColorCorrect, Grade, or Hue.
There are several common post effects that you might use. Here are some of the most well-known:
Chromatic Aberration
Chromatic aberration is an optical phenomenon that occurs when a lens or optical system fails to focus all colors of light at the same point. This happens because different wavelengths of light are refracted differently as they pass through the lens due to variations in the refractive index of the material.
To create chromatic aberration in Nuke, you can use Shuffle nodes to select each R, G, and B channel and then shift them individually using a Transform in Y.

Vignetting
Vignetting in photography refers to a phenomenon where the edges of an image are darker than its center. This optical flaw can be caused by several factors and can either be used intentionally for artistic effects or corrected if undesirable. You can create vignetting using a Roto with a circular shape and a Grade. Use the Roto as a mask and adjust the gain of the Grade to achieve a cool and stylish vignette.


Grain
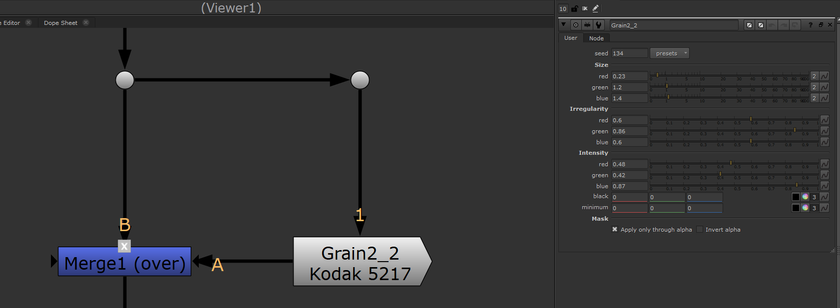
You can add grain using the Grain node in Nuke, with options such as Kodak 5248, Kodak FX214, or Kodak 5217. You can easily find the grain type that suits your needs and adjust the intensity and irregularity to match your desired look.
Camera Dirt
Camera dirt adds realism, though it should be very subtle. It simulates dust or imperfections on the camera lens, enhancing the authenticity of the shot.

Final Nodes
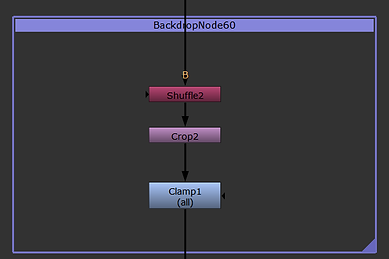
At the end of the composition, it is important to use a few nodes to clean up the comp. Use a Shuffle node to inject a full alpha and a Clamp node to adjust the white balance, avoiding burnt-out values.
By applying these effects and final adjustments, you can achieve a polished and cohesive final composite.

I hope this lesson has served you well !

