


Controller Animation
toolskit2.0
In the "Controller Animation" sub-tab, you will have the option to access the list of all controllers, reset them, and boost the animation. These tools will help you speed up the animation process and easily reset your rigs.

The first button, "Reset Controller", allows you to reset the position of the controller or object that you have selected.

after pressing the button
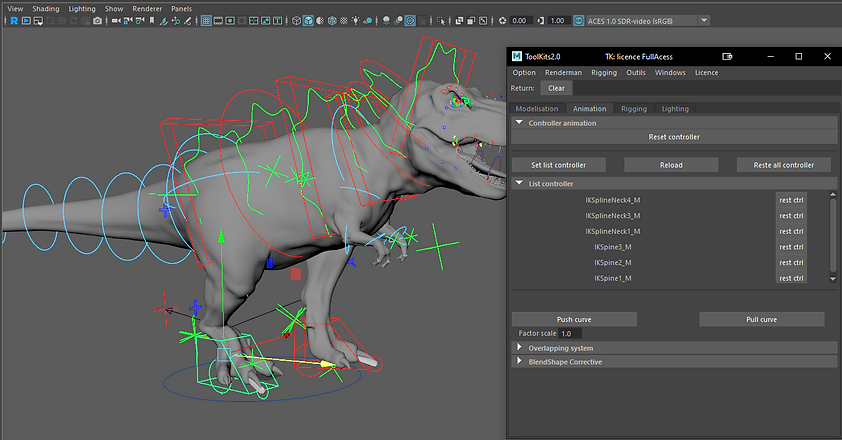
The three consecutive buttons will allow you to manage all the controllers in the scene. To do this, simply select all the controllers you want, and then press the "Set list controller" button. In the "List Controller" sub-tab, you will find all the controllers you have selected, along with their names and the option to reset the controller by simply pressing the button without the need for further selection.


In the "List Controller" sub-tab, you will have the option to access the list of all controllers, reset them, and boost the animation. These tools will help you speed up the animation process and easily reset your rigs.
You only need to do "set list controller" once because the next time you open your scene, you just have to press "reload" to reload the entire list of controllers. The last button allows you to reset all controllers at once.

The last section will allow you to increase or decrease the keyframes in your animations. To do this, simply select the keyframes you want to adjust. Press "Push Curve" to amplify the animation or "Pull Curve" to reduce the animation. You can choose your precision with the "Factor Scale" parameter.

"Blend keyer" is a tool that allows you to interpolate the key before and after the selected frame. This will enable you to quickly create easing in and out effects, select precisely the percentage you want between the two frames, and have full control over the blend percentage between the previous and next key. There are predefined buttons that allow you to have precise values, or you can use the slider for smoother adjustments.

"Modify AnimCurve" These are buttons that allow you to choose the type of curve you want for the selected objects. There are three buttons: the first one to set the curves to step by step, the second one for linear curves, and the third one to make them Bezier curves.

The last two buttons will allow you to move the keys after the selected frame. With the button on the left, you can remove one frame each time you press it on all keys that are after the selected frame. And the other button will allow you to add one frame to all keys after the selected frame.
